I want to start putting together some branding stuff to deploy, so I need to create a solution and some base projects before I get started.
I have decided on the following projects to start off with
GISIT.SharePoint.Branding – Masterpage, css, images, page layouts, theme
GISIT.SharePoint.PageComponents – Webparts (if we decide to add apps later we will need to add a different type of project specific to apps but I’m not sure on this yet)
GISIT.SharePoint.Common – This will be a class library for constants or any common SharePoint functions. There are two ways this could be implemented, a class library or a sharepoint project. The difference between these is the class library needs to be added as a dll to the SharePoint package of any other projects (branding and page components wsp’s), whereas the WSP way would allow you to directly deploy and update the dll directly using the wsp built. If something needed to be only changed in the dll such as a constant value, we will have to to an update on either the branding or page components, which I am happy with at this stage.
1. Open Visual Studio
2. Create a new project.
Name it [Company].SharePoint.Branding
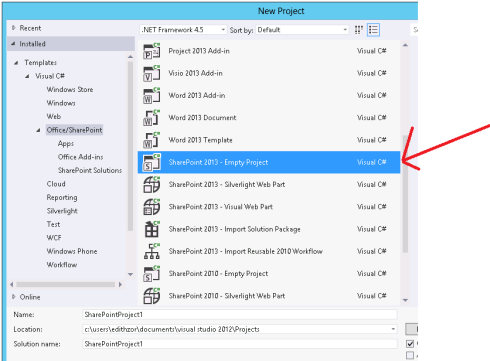
Select SharePoint 2013 Empty Project
Change the solution name to [Company].SharePoint
3. Click on the solution and add a new project
4. Select Class Library (or SharePoint 2013 Empty Project if you want to deploy this as a WSP)
Name it [Company].SharePoint.Common
5. Create another new project in the solution.
Select SharePoint 2013 Empty Project
Name it [Company].SharePoint.PageComponents
6. Right click the whole solution and select Rebuild
7. Add the common dll to the branding and page component projects. First go to the branding project and right click Reference. Click on Add Reference.
8. Click on Solution on the left hand side, then select [Company].SharePoint.Common. Click OK
9. Double click on the package for branding.
10. Click on the advanced tab
11. Click on Add, then Add Assembly from Project Output
12. Select [Company].SharePoint.Common then click OK
13. Save the package file and follow the same steps for the Page Components project.
14. The project is now ready for us to start adding content to. Starting with branding.


